Installation Checklist
ETL+ Connection to ODBC
Click here to download and access Google BigQuery ODBC driver & documentation.
ODBC driver to use in ETL+:
Have your source system’s ODBC driver on the same Windows computer where ETL+ is
Create or use an ODBC System DSN (instead of User DSN)
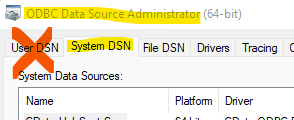
The ODBC driver must have the same 32/64bit build as ETL+
If you haven’t installed ETL+ yet: ETL+ Deployment Instructions.
Login to ETL+ (help here).
Adding a new ODBC source: On ETL page’s left panel, click
Add Source->ODBC.Maintaining an ODBC source: On ETL page’s left panel, right-click the ODBC source →
Properties.On the
ODBC Data Sourcespage, select the correct ODBC Name from the list.Can’t find your ODBC? Be sure ETL+ and the ODBC have the same 32/64bit build.
ODBC requiring credentials:
double-click the ODBC name→enter credentials→Connect.You might leave the Alias as is, or customize it.
Click
Connect.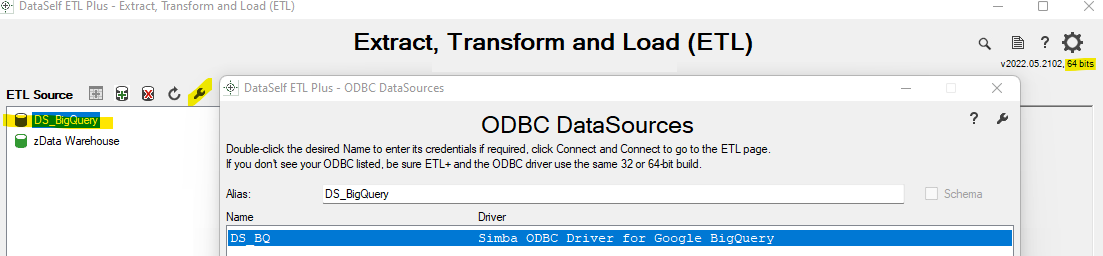
You’ll get back to the ETL page and see tables under the new ODBC source on the left panel.
Mapping and Loading Tables
To view tables available from your ODBC source on the left panel, right-click the ODBC source →
Refresh.To map an ODBC table to the data warehouse,
double-click its nameon the left panel, or right-click on it →Add Table.You’ll now see the table added/mapped to the center panel.
To preview its data, right-click the table on the center panel →
Preview.To load its data to the data warehouse, right-click the table on the center panel →
Load Now.Click the
Logicon (top right) to view data load results. Log page help here.
Schedule the Data Load
On the ETL main page, click
Refresh Batch(top right icon on the center panel).Select a Refresh Batch or create a new one to load your ODBC source data on a schedule (help here) → on the right panel, be sure the ODBC source tables to load have their boxes checked and in the desired load order.
To load them now, click the
Refresh Batch Now(play icon) on the left panel for the desired Refresh Batch.To schedule the data load:
Click
WTS Settings-> enter the WTS parameters →Apply.This step might require you to run ETL+ app as “Run as administrator” in Windows.
Click
Close->Close.
Testing
After ETL+ has loaded your ODBC source tables, this is to check if the data extraction process finished successfully and row count per extracted table matches with your ODBC source tables.
Steps
Login to ETL+ (help here).
On the ETL main page, click the top-right
Logicon. Log page help here.Scroll down on the log page and double-check that no table load failed, and the row count matches with the source ODBC tables. Following is an example highlighting two tables from a sample ODBC database and their loaded row count.

ODBC Syntax Tips
Invalid dates in SQL (click here): try the following CASE statements to work around them:
CASE WHEN Date1 BETWEEN '1800-01-01' AND '2500-01-01' THEN Date1 ELSE NULL END as Date1
or
CASE WHEN Date1 >= '1800-01-01' AND Date1 <= '2500-01-01' THEN Date1 ELSE NULL END as Date1
or
CASE WHEN Date1 >= {d'1800-01-01'} AND Date1 <= {d'2500-01-01'} THEN Date1 ELSE NULL END as Date1